
This is a guest post from Natalie's husband, Luke, an enthusiastic weekend baker.

Baking sourdough bread has become a weekly ritual for our family. In college, Natalie and I both worked at an artisanal bakery so bread is an important part of our life. It also goes without saying that a crusty sourdough loaf is a pleasure in and of itself.
No doubt that baking sourdough at home can seem a little intimidating at first, but I've found that with a good recipe and the right equipment it is quite doable to consistently churn out amazing bread that rivals what you can find at most bakeries. I hope this blog post is an instructive introduction and gives you the confidence to pursue your own bread adventure!

My first exploration into the world of artisanal bread began with this No-Knead Bread recipe written up by Mark Bittman for the New York Times. For those of you who feel intimidated by sourdough starters, bulk fermentation and proofing, this is a great start. All you have to do is mix ingredients the night before, let the dough ferment for 12-18 hours, shape it into your loaf, let it sit another 2 hours, then bake. The process of baking this recipe in the bread cloche is exactly the same as the sourdough recipe, so you can skip to the end to see how that is done.
The recipe that has become my mainstay sourdough is based on the Country Bread recipe from Tartine Bakery in San Francisco. Chad Robertson of Tartine is an amazing baker and I would highly recommend you check out his books on bread. But for now I hope this serves as a helpful guide.
Here is what you will need before you get started:
Ceramic bread cloche or dutch oven
Ceramic bread cloche or dutch oven
Proofing basket or medium kitchen bowl with cotton towel
Dough scraper
Digital kitchen scale that measures in grams
Bread flour (I recommend King Arthur bread flour)
Whole wheat flour (King Arthur or Bob's Red Mill)
Dechlorinated water (leave a pitcher of water uncovered 24 hrs)
Fine-ground sea salt
Dough scraper
Digital kitchen scale that measures in grams
Bread flour (I recommend King Arthur bread flour)
Whole wheat flour (King Arthur or Bob's Red Mill)
Dechlorinated water (leave a pitcher of water uncovered 24 hrs)
Fine-ground sea salt
- The Sourdough Starter -
I would encourage you to find a friend who has a healthy sourdough starter to share. (That's what I did!) But if you don't have such a friend, here is how to start a sourdough culture from scratch.
Ingredients
Roughly 1000 grams bread flour
Roughly 1000 grams whole wheat flour
Dechlorinated water
Roughly 1000 grams bread flour
Roughly 1000 grams whole wheat flour
Dechlorinated water

Mix 50 grams of bread flour, 50 grams of whole wheat flour, and 100 grams of water in a small bowl or jar. Cover with a towel and let sit at room temperature until mixture begins to bubble and puff, 2-3 days. This means that wild yeast have colonized your flour-water mixture and you now have a starter culture! Begin regular feedings, discarding 3/4 of the starter each day and feeding with 100 g of the bread flour / whole wheat flour mixture and 100 g of water. When the starter begins to rise and fall predictably and smell sour it is ready to use.
- The Bread -
Ingredients
200 grams leaven
750 grams dechlorinated water
900 grams bread flour
100 grams whole-wheat flour
20 grams fine sea salt
100 grams rice flour for dusting
200 grams leaven
750 grams dechlorinated water
900 grams bread flour
100 grams whole-wheat flour
20 grams fine sea salt
100 grams rice flour for dusting
Starting Your Leaven
The night before baking, take 50 g of your starter, combine with 100 g of dechlorinated water, 50 g bread flour, and 50 g whole-wheat flour. Mix thoroughly, cover with a towel or plastic wrap, and allow to sit overnight or for 12 hours. It will have grown in size and be full of air bubbles the next morning.

Mixing the Dough
The next morning, place 200 g of leaven into a large mixing bowl and add 700 g of dechlorinated water, mixing the leaven to disperse throughout. Add 900 g bread flour and 100 g whole wheat flour and thoroughly mix. This is where a bread whisk comes in handy. Or just use your hands! When the dough is mixed, cover with a towel and let it rest for 30 minutes. After the rest, which is called autolyzation, add an additional 50 g of water and sprinkle the 20 g of sea salt over the dough, mixing the salt throughout with your hands. You can squeeze the dough between your fingers or fold in the salt like you're kneading the dough.


Bulk Fermentation
Now that you've mixed your ingredients it is time for bulk fermentation. You'll need to stay close at hand for the next 3 hours throughout this process. Find a warm spot (75-80 degrees) to place your bowl of dough. I like to use the inside of my oven with the light turned on. The light alone provides enough heat to keep the temperature around 80 degrees. Cover the bowl with a damp kitchen towel or plastic wrap and set your timer for 30 minutes. After the 30 minutes is up, uncover your bowl, wet your hands slightly, and reach under the dough, pulling up and stretching each of the four corners of the dough and folding them back over. This stretching helps the chains of gluten to form in the dough giving it the ability to rise and hold its shape. Do this for a total of 6 times over 3 hours and you'll notice how the dough becomes billowy and increases in volume 20-30%.

Shaping the Loaf
Now that your dough is ready to shape, clear off a counter top or large cutting board and generously dust with white flour. Scrape the dough out of the bowl and onto the surface. Cut the dough into two equal portions keeping your fingers dusted with flour so they don't stick to the dough. Now fold each side of the cut piece up onto itself so that the floured side remains on the outside of the loaf. Use your hands to work each into taut rounds.


Flouring the Baskets
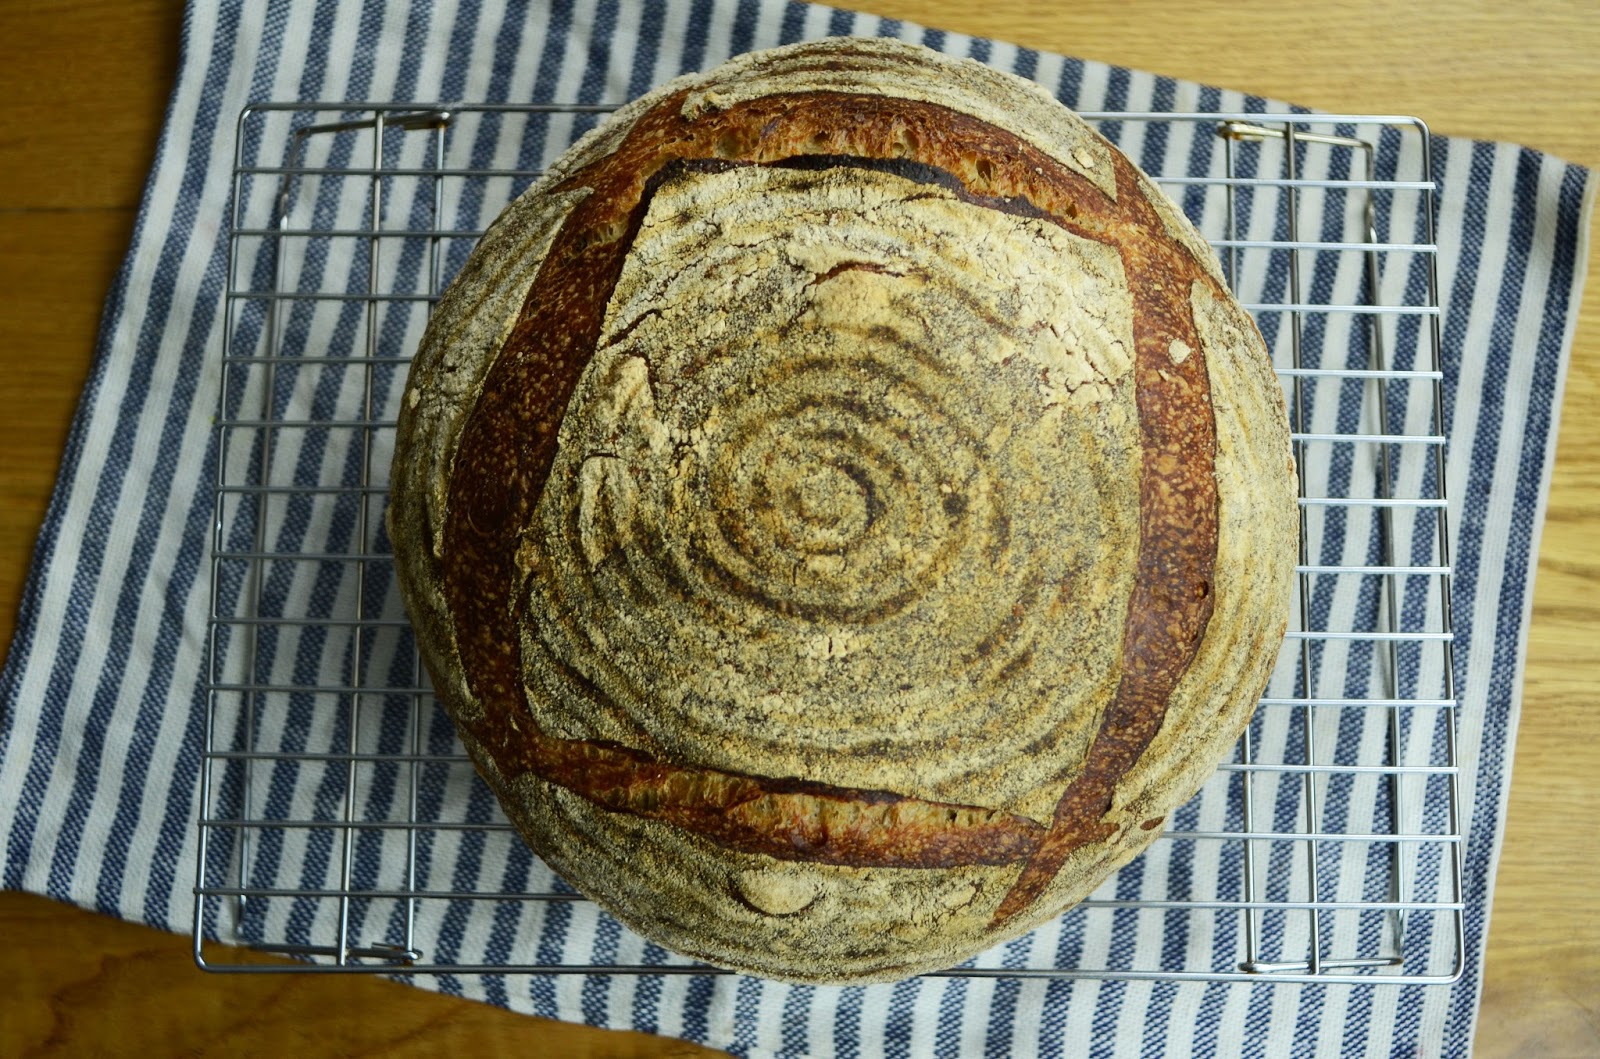
Mix 100 g of rice flour with 100 g of whole wheat flour and generously dust the inside of your proofing basket. If you don't have a proofing basket, dust a cotton cloth and place inside a medium sized kitchen bowl. I love using a wooden proofing basket because it leaves a beautiful spiral pattern on the crust that is traditional to the craft.
Final Shaping of the Loaves
Lightly dust the rounds with whole wheat flour and use a dough scraper to flip them over onto your work surface. Start with one round and pull the bottom two corners towards you, then fold them up into the middle third of the dough. Now do this with the left and right sides of the dough, folding them over into the center. Finally, lift the top corners up and down over the previous folds. Now roll the dough over so that the folds are facing down and use your hands to shape into a taut ball. Repeat this with the other round.


Proofing
Transfer each round into a floured proofing basket, seam-side up. Cover with a damp towel and allow to rise at room temp for 3-4 hours or in the refrigerator for 10-12 hours. A cold proof with give the bread a stronger sour flavor and make it easier to handle when dumping out of the proofing baskets. Place your proofing baskets in plastic bags or wrap in plastic wrap if proofing in the fridge so that the dough does not dry out.

Baking
At least 30 minutes before baking place your bread cloche or dutch oven in the oven and pre-heat to 500 degrees. Dust the tops of the dough with cornmeal or the rice-flour mixture while they are still in their baskets. Now very carefully remove the heated cloche or pot from the oven and remove the lid. Turn the loaf out of the basket and into the hot cloche or pot. Next take a razor blade or knife and score the top of the loaf to allow it to expand. Place the lid on the cloche or pot, place back into the oven, reduce the temperature to 450 degrees and allow to bake with the lid on for 20 minutes. After 20 minutes remove the lid and allow to bake for another 20 minutes with the lid off. Rotate the pan after 10 minutes to allow for even browning. The crust should be a rich, dark golden-brown color when finished.


Cooling
Carefully transfer the hot loaf onto a cooling rack and allow to cool for 15 minutes before slicing. Increase the oven temperature to 500 with the empty cloche or dutch oven inside to bring them back up to temperature before repeating the process for the second loaf.

I wish you success and hope you enjoy your bread! Don't hesitate to get in touch if you have any questions. Also, if you need a cloche, proofing basket, or bread whisk you can find them in our shop.
Happy baking!
Luke
5 comments:
This looks amazing! I think I smell it through my screen :)
Amazing! Have you ever heard of anyone making this or sourdough bread with a gluten free flour blend? Without the gluten I'm not sure it would work. ??
Thank you, thank you for this post! I've been hoping to get into sourdough baking and this is a beautiful intro. Thanks Luke and Natalie
Trying this out today! I've been experimenting with sourdough for a month or so now, excited to try it your way!
Regarding the gluten free question - gluten is necessary for the dough to have its elastic property allowing for the bread to rise and retain large air pockets in the crumb. I'm sure people have tried making sourdough with gluten free flour, but the results are not going to be the same.
Post a Comment